
I hope you're enjoying the journey of our travel trailer makeover. It moves much more quickly for you in the blog world than it did for me in the actual real-life makeover, but I'm getting to relive the drastic transformation without having to go through all of the work again.
There were 2 spots in the camper that I've not been able to find new lights for due to the space required for the slides to come in. One is in the bunkhouse, and the other is in the main living area. For now, we'll keep the standard lights there, and I'm not entirely concerned if they don't ever get replaced.
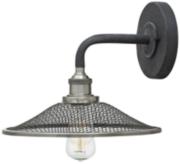
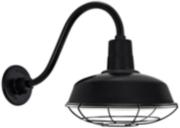
I found these super cute Farmhouse Cage Lights, and I ordered them immediately! I was so excited to get them installed. They came with Edison bulbs that were perfect (or so I thought,) and I all but dragged my husband out to the storage facility to install them. They wouldn't turn on. He tried several different things, and we were trouble-shooting all kinds of things. We spent about 2 weeks trying to get them to turn on. Then, I found it! I hadn't seen it on any of the blogs I had been reading, but sure enough...some campers ONLY support 12v bulbs. Sure, we plug in with 50 amps to run our air conditioners, but our camper only supports 12v bulbs. I was so excited to have these beauties come on as soon as we got 12v Edison bulbs! The moral of the story is to make sure your light bulb matches the voltage of the existing fixtures whether it's 120v or 12v, be sure you know how your camper is wired.


 |
| Reclaimed Shiplap Peel & Stick Wallpaper |
I initially only bought a couple of rolls of this Peel & Stick Wallpaper. (You want to make sure they were made in the same batch/lot so that the colors match, so it's good to order them all at once.) I ended up using it in more places than I originally thought I would, and I had to order a 3rd roll. Fortunately it matches my 2 original rolls. I used it on the 2 walls you see here, one next to the main slide out, a wall as you enter the bunkhouse, on the master sliding door, and as an accent in our Master bedroom.
You can see the smudges on the chalk map above. I initially used regular chalk, but of course, someone needed to touch it to see if it was real chalk. So, I brought my chalk markers out and have labeled the states our RV has visited.

 |
| Chalk Map Peel & Stick Giant Decal I cut the "Adventure Awaits" on my Silhouette, and you can have that SVG file for FREE below. |


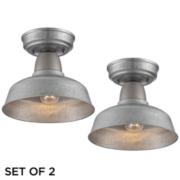
I'm not a giant by any stretch, but I frequently bump my head on the slide out ceiling or lights even when they were the super low-profile standard camper lights that came with it. I was determined to find a way to create something that is low profile that has a switch. I wandered around our home improvement stores, and this is what I came up with!
A piece of thin wood, some stain, black cast iron floor flange, a cast iron elbow, a coupler, a lamp receptacle, and wire. (These were MUCH more affordable to make than some of my other lighting choices.)
I was able to find a coupler that fit perfectly over the base of the lamp receptacle, so once we had the new lamp receptacle wired, we super glued it inside of the coupler before assembling the light fixture. The lamp receptacles I found were all for 3 way lights. My light isn't 3 way, so I just click it twice to turn on and twice to turn off. We made 2 of these for the living area in the slide out, and I have something very similar planned for over my kitchen sink. Instead of having 1 light using an elbow, I have a T-pipe so that it will have 2 lights to brighten my sink and countertops like daylight.
 |
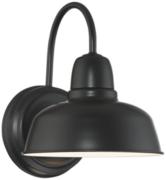
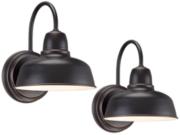
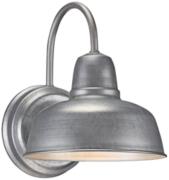
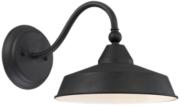
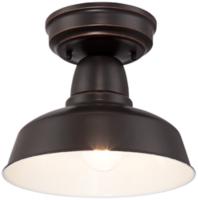
| Barn Light and DIY Industrial Light |
I ordered the barn light and was thrilled when it arrived. I took it out of the box, and then it hit me.... There's not a SWITCH for that light like there is for the ceiling lights. Fortunately, I had not yet thrown away the little MIS-MATCHED (yes, it really did annoy me that they were different colors) sconce light that came in the camper. We pulled the wiring and button from it, and added it to my new barn light. We added another 12v Edison, and it's perfect!


 |
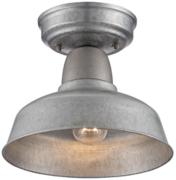
| Standard Light Fixture in an RV Standard Light on the left, LED on the right |

When the lights are off, you really have to look to see if there's an incandescent or LED bulb. Our incandescent lights were very "warm" literally and visually. The LEDs are a more neutral white, and they don't emit the heat!
 |
| The same Reclaimed Shiplap Peel & Stick Wallpaper from the living area, but turned sideways in the Master Bedroom. |
 |
| I cut this with my Silhouette as well, but I've tried to remove our wedding anniversary below the arrows from the image for the blog. FREE Downloadable SVG is below. |


No comments:
Post a Comment