I had scoured blogs and Pinterest, but I had struggled with what colors I wanted to paint my lower cabinets. I knew I didn't want them white, because with kids and a dog, one trip out would likely ruin my bright white lower cabinetry. There were also areas that I felt like if I used the darker color, it would make rooms too dark (like the bunkhouse.)
 |
| Cougar 31SQB Floorplan (Even the drawing is BROWN!) |
No more! OUT with the browns, and in with the white and grays. In the end, I settled on 3 colors.... Iron Ore, Argos, and Winds Breath for the win!
Iron Ore, Argos, Winds Breath
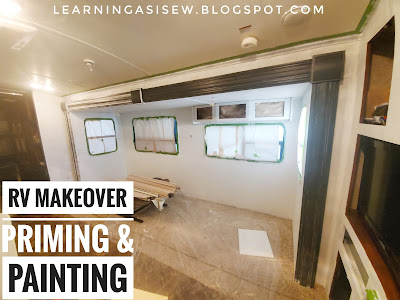
Here's a spot that I thought I wanted to paint the trim with the darker Iron Ore gray. However, once I had it done, I hated it. It was much too stark. All of those grooves are a pain to paint anyway, but we primed and painted it a total of 3 times. I'm really happy with the white trim! This was just part of the process.
So, I didn't hesitate to get one of her. She was a HUGE help in completing this makeover!
 |
| Really, these were pretty easy except for under the vent hood. |
 |
| Bathroom BEFORE |
When we were taking the cabinet doors out, the kids had the bathroom doors out before I could even get a "before" picture. So here it is after the walls and cabinets were sanded and wiped down...sans cabinet doors.
I would love to know the reason for there being a 2 inch gap between the bathtub and the sink cabinetry. It's crazy difficult to paint between them, and it's a waste of space! I took some of the paper that I used to cover the windows during the renovation, and used Frog Tape to tape it to one side at a time (either the tub or the cabinets) so that I could paint the tub walls white and the cabinet Iron Ore. I had to use skinny foam rollers on the longest handle I had in order to paint that space.
Y'all. I'm not even going to lie. The Subway tiles that I put in the kitchen area were pretty easy all things considered. These Tic Tac Tiles Peel & Stick hexagons are the devil. I mean, you really need level plumb lines and the whole nine yards, because they STILL can make you crazy. Sure, they're cute, and I love them in the small space. I should probably rip them all down and start over, but...NO. I never want to hang another peel and stick hexagon in my life. I did spray some adhesive spray on the walls before I hung them. It required that I wait a minute before adhering the tile sheets so that it didn't adversely effect the peel & stick. But since we live in Texas and it can get HOT, I didn't want to come in and find them all in the sink or on the floor.
 |
| This is the only room that the walls aren't painted white. I used the Argos on the walls and Iron Ore on the cabinets and the moulding. It softens the room a little bit, and I love it! |
 |
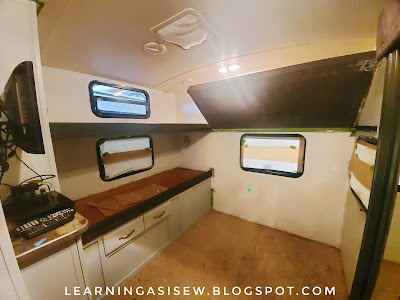
| In the bunkhouse, we painted the walls white (Winds Breath), the bed trim Iron Ore, the below bed cabinets and entertainment center Argos. |
With the paint completed, it was time for some other fun! We added wallpapers, vinyl decals, TONS of hooks, new light fixtures, recovered door overhangs, ordered custom blinds, made curtains, and so much more. Stay tuned....
Check out the rest of my RV posts here.


No comments:
Post a Comment