home categories contact about me store
This blog is part of at least one affiliate program. As an Amazon Associate I earn from qualifying purchases.
Showing posts with label holiday. Show all posts

Saturday, November 28, 2020

Elf on the Shelf: Magic Size It FREE Printable

Have your elves ever wanted things to be "just their size?"  This easy printable is great for "making" Oreos or M&Ms go from "regular size" to "minis."
Check out all of my other Elf on the Shelf ideas and printables, too!
You can buy ALL of my Elf on the Shelf printables for easy download in the store on the right side of the page.
As always, I encourage you to create some of the "super special" Elf surprises, and then trade them with your friends and neighbors so that the joy (and efforts) are shared!!!
By all means, share this, pin it, print it, blog about it, but please link back to this post. 

Elf on the Shelf: Staying Alive Disco Party in Quarantine Printable

Let's face it, we're all getting through this the best we can.  Our elves, Buddy Kringle and Football, decided to make light of it all and have a 70's Disco Party to celebrate "Stayin' Alive!"  If you have some of the little Disco ball ornaments, use them! Feel free to line the dance floor with walls of toilet paper, hand sanitizer, and disinfecting wipes.


Here is the printable backdrop.

Check out all of my other Elf on the Shelf ideas and printables, too!
You can buy ALL of my Elf on the Shelf printables for easy download in the store on the right side of the page.
As always, I encourage you to create some of the "super special" Elf surprises, and then trade them with your friends and neighbors so that the joy (and efforts) are shared!!!
By all means, share this, pin it, print it, blog about it, but please link back to this post. 

Wednesday, November 18, 2020

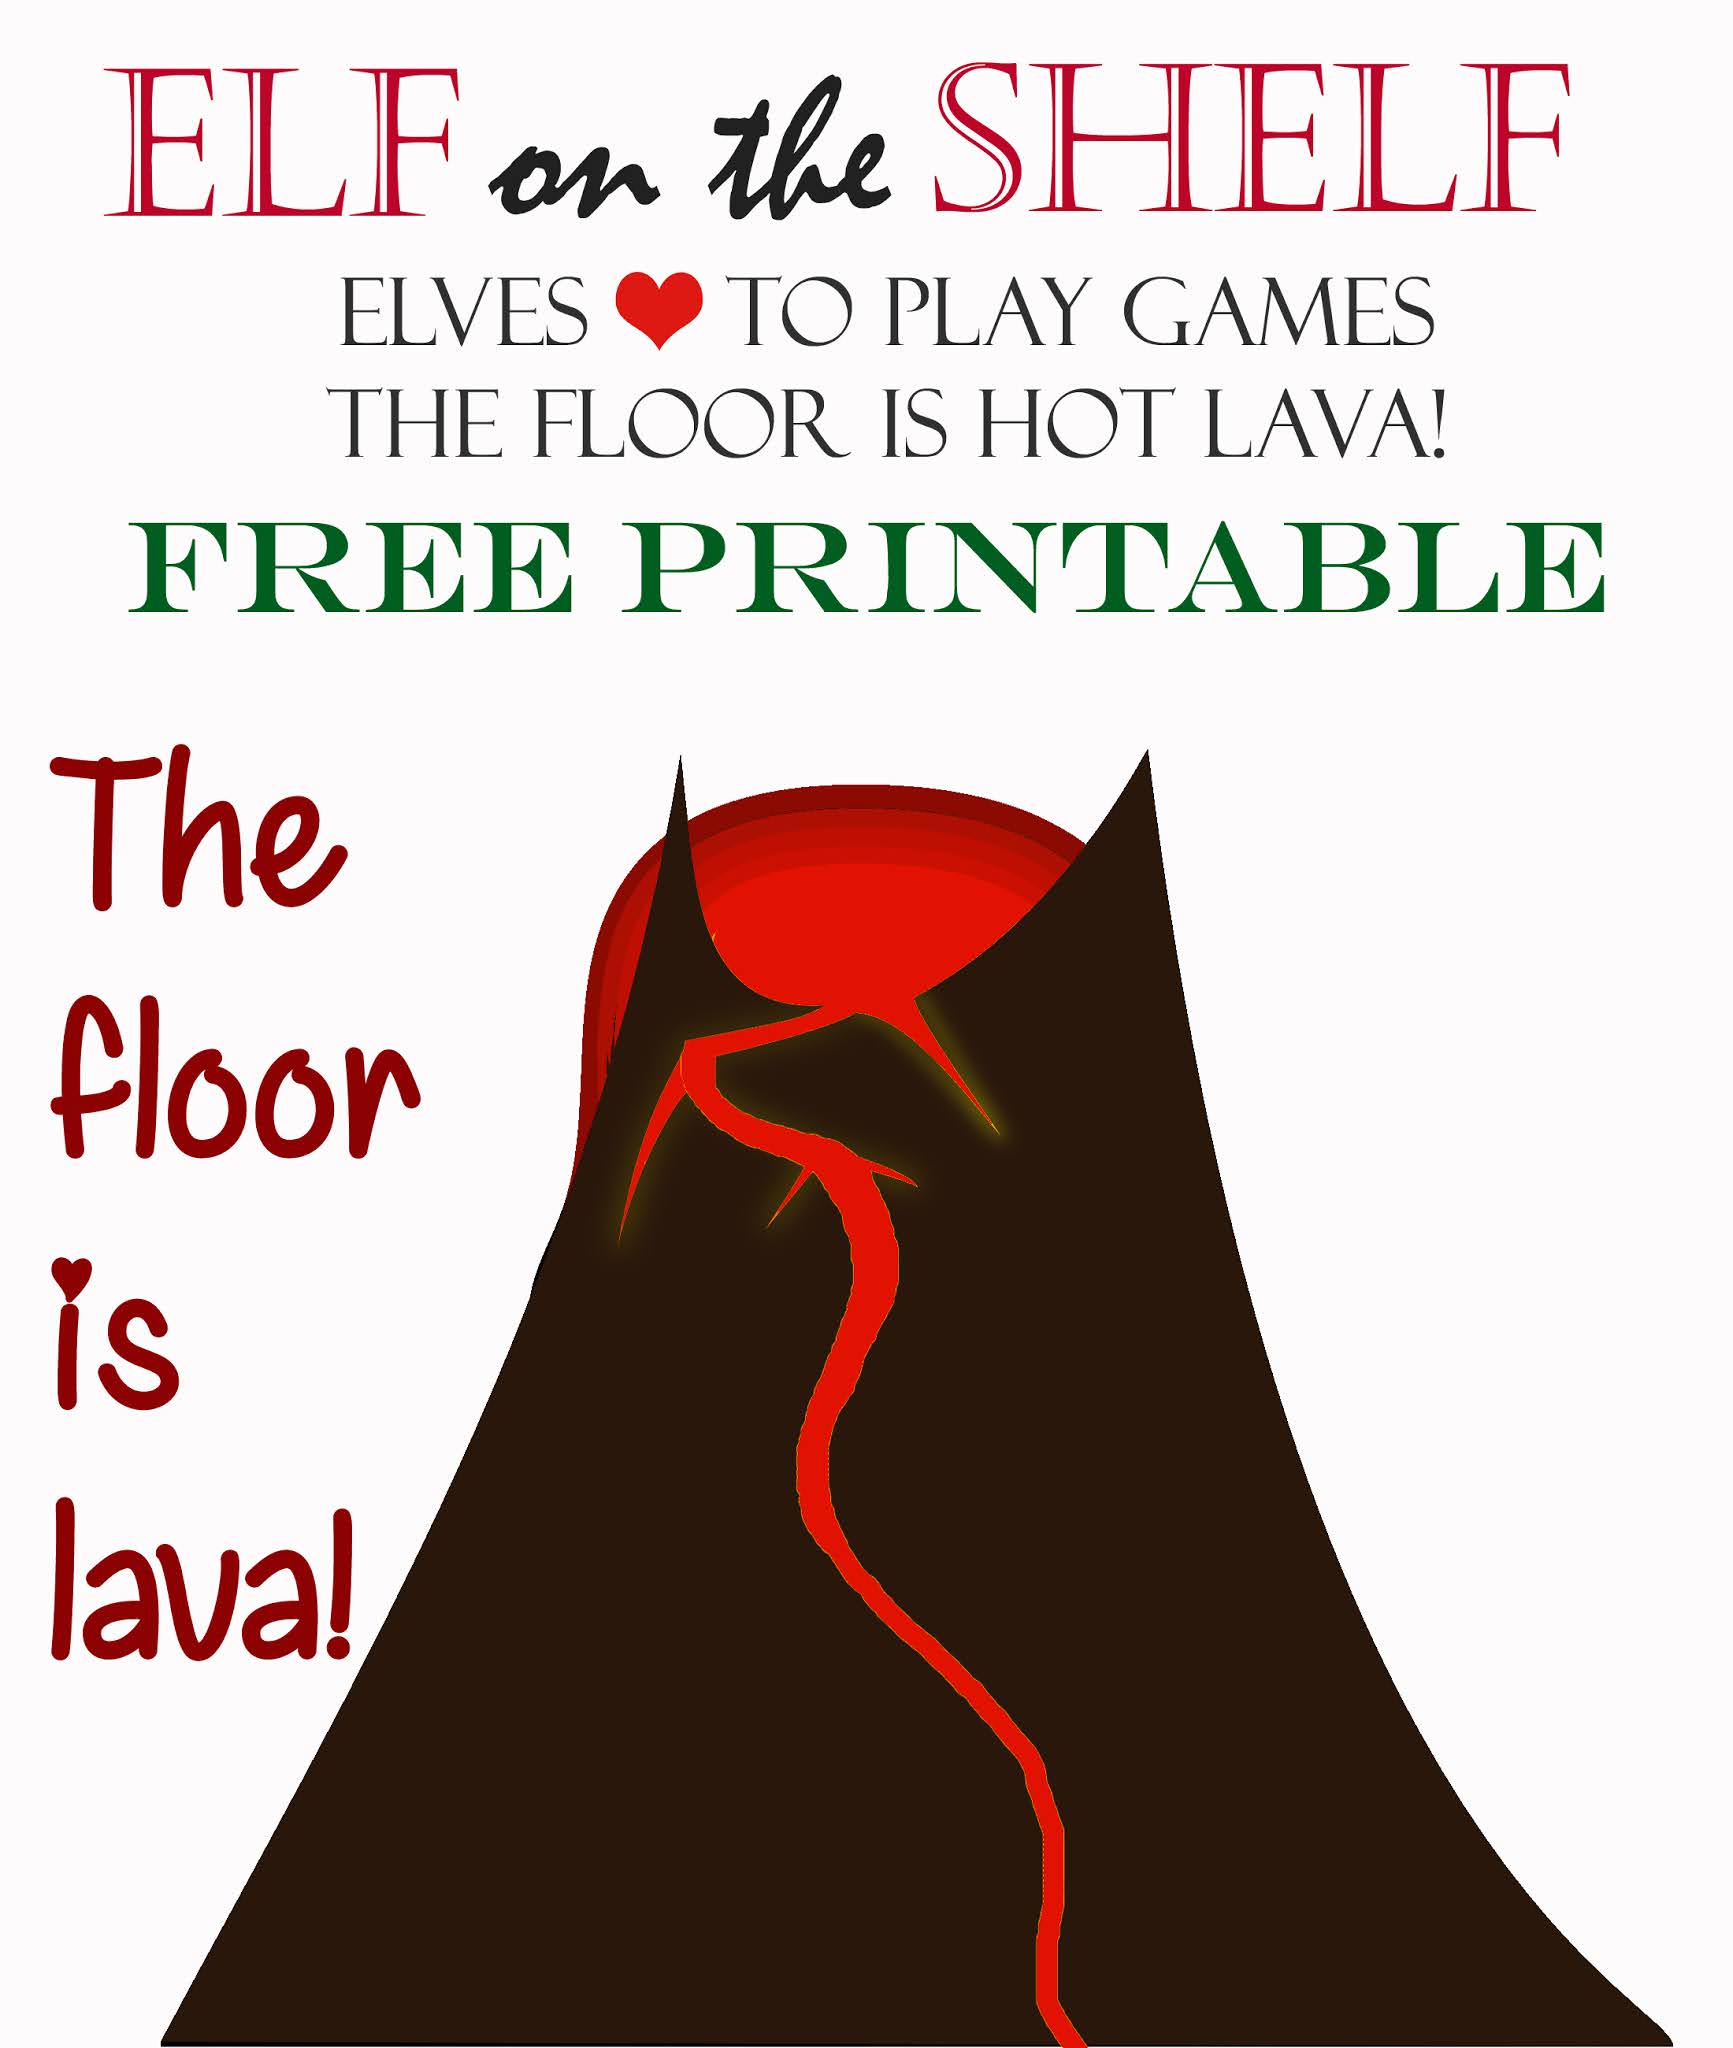
Elf on the Shelf: The Floor Is Lava! Free Printable

Tape the volcano to a wall. You have red tissue paper on hand already for your Christmas wrapping, so crumple up a couple of pieces and place them next to the volcano.  Your elf can be in the Christmas tree, on top of furniture over the tissue paper, taped to the wall, or strung from the ceiling to avoid the lava.


Get the volcano printable here.

Check out all of my other Elf on the Shelf ideas and printables, too!
You can buy ALL of my Elf on the Shelf printables for easy download in the store on the right side of the page.
As always, I encourage you to create some of the "super special" Elf surprises, and then trade them with your friends and neighbors so that the joy (and efforts) are shared!!!
By all means, share this, pin it, print it, blog about it, but please link back to this post. 

Sunday, November 15, 2020

Sweet Potato Gnocchi with Sage Browned Butter Sauce

 Printable Recipe

Ingredients: 

For the Gnocchi: 

  • ~2 lbs. sweet potatoes 
  • 1 1/2 t ground cinnamon 
  • 2/3 C whole milk ricotta cheese, well drained 
  • 1 t salt 
  • 1/2 t black pepper 
  • 1 1/2 C all-purpose flour, plus 1/3 C for the work surface 
For the Maple Cinnamon Sage Brown Butter: 
  • 1/2 C unsalted butter (1 stick) 
  • 20 fresh sage leaves 
  • 1 t ground cinnamon 
  • 2 T maple syrup 
  • 1 t salt 
  • 1/2 t ground black pepper 

Directions: 

For the Gnocchi: 

  1. Preheat the oven to 425 degrees F. 
  2. Pierce the sweet potato to allow steam to escape. (You'll notice the repeated notes about moisture for making gnocchi.) 
  3. Bake the sweet potatoes until tender & fully cooked, between 40 to 55 minutes depending on size. 
  4. Cool slightly. Cut in half & scoop the flesh into a large bowl. 
  5. Mash (or puree) the sweet potatoes & transfer to a large measuring cup to make sure the sweet potatoes measure about 2 cups.  If they are "wet", drain off any liquids.  Extra moisture can make the gnocchi require too much flour. 
  6. Transfer the mashed sweet potatoes back to the large bowl. 
  7. Add the ricotta cheese (drain any liquid, don't stir it back in) , salt, cinnamon, & pepper & blend until well mixed. 
  8. Taste mixture to determine seasonings. 
  9. Add the flour, 1/2 cup at a time until a soft dough forms. Additional flour may be required if the dough is still really sticky.
  10. Lightly flour a work surface & place the dough in a ball on the work surface. 
  11. Divide dough into 6 equal balls. 
  12. (***Test a couple of gnocchi before you roll ALL of the dough out. Shape & cook a few dumplings in a small pan of simmering salted water to make sure they're right before rolling & cutting the whole batch. If the gnocchi fall apart, work the dough a bit longer & add a little more flour.)
  13. Roll out each ball into a 1-inch wide rope. 
  14. Cut each rope into 1-inch pieces. 
  15. Roll the gnocchi over the tines of a fork. 
  16. Transfer the formed gnocchi to a large parchment-lined baking sheet. 
     Brittyn has been making them with me for years.  (2018 pictured.)
  17. Continue with the remaining gnocchi. 
  18. Can be frozen in single layers at this point and then transferred to a Ziploc for storing until ready. (Do not defrost before cooking.)
  19. Meanwhile, bring a large pot of well-salted water to a boil over high heat. Once the water is at a rolling boil, add the gnocchi in 3 batches & cook until tender but still firm to the bite, stirring occasionally, when they float to top, remove them. If you overcook them, they get really gummy. 
  20. Drain the gnocchi using a slotted spoon onto another lined baking sheet. Tent with foil to keep warm & continue with the remaining gnocchi. 

For the Brown Butter sauce: 

  1. While the gnocchi are cooking, melt the butter in a large sauté pan over medium heat. 
  2. When butter has melted, add sage leaves. Continue to cook, swirling butter occasionally, until the foam subsides & the milk solids begin to brown. 
  3. Remove the pan from the heat. Stir in cinnamon, maple syrup, salt, & pepper. Careful, mixture will bubble up. 
  4. Gently stir. When bubbles subside, toss cooked gnocchi in brown butter. 
  5. Transfer gnocchi to a serving dish & serve immediately.


Friday, November 13, 2020

Peanuts Themed Christmas Hallway

Yes, I've been doing Peanuts Gang inspired bulletin boards for the main entry hallway at our elementary school, but the 4th grade teachers wanted their entire hallway to be transformed.  So this covers from the floor to the top of their bulletin boards. The 3 scenes cover three huge walls.  It's *almost* like you're in the story with the characters.  Again, I used an old school hand-rolling die cut machine for the 1" circle snow, snowflakes, and the larger yellow string light circles.  Everything else was done by hand.  
"Merry Christmas, Charlie Brown!"

Charlie Brown and Linus in the Tree Farm

Charlie Brown and Linus in the Tree Farm

Lucy offering advice to Charlie Brown


Ice skating on the pond


Friday, October 19, 2018

Winter Snowmen & Reindeer Bulletin Boards

I'm going back through old pictures looking for bulletin boards that I've done over the years, because I realized that I haven't shared them!  These are some that I did last Christmas for our elementary school.  I have vowed to start taking more pictures, because I really simply don't have enough...and I missed out on so many of the fun details!  For example, in the Making Friends snowman board below, the basket next to the snowmen holds snowman arms and a scarf.  A black top hat sits next to the basket.  
The snowman placing the star at the top of the tree?  He has a PRECIOUS winter hat on, and the picture cuts off the big fluff ball at the top of it.
Each of the reindeer has a name plate at the top of their stall.
I often get asked about templates.  I don't have any templates for my boards, as I free-hand most of what I do.  Even if you aren't confident in your craftiness, you can always connect a projector to your computer, use some painter's tape to hang paper on the wall, and use my images as your template.  
Hopefully this gives you some inspiration for some wintery bulletin boards or party decorations of your own!


Thursday, October 11, 2018

Gingerbread-themed Bulletin Boards

Y'all, I just realized how popular my Polar Express-themed bulletin board post has become!  I also realized that I've done MANY bulletin boards since my twins were first graders, and so I'm going back through to find old pictures to share.  Hopefully they inspire you to make your hallways or parties more festive! 


In 2nd grade, the teachers at our Elementary School do a story and a gingerbread activity that leads to a fun "scavenger hunt" through the school as they look for clues and notes left by the runaway gingerbread man.  So, it seemed fitting to decorate the 2nd grade hallway with gingerbread houses.  Everything you see here is made with paper, glue, and an occasional marker.  I only wish I had more pictures!


Saturday, December 19, 2015

Elf on the Shelf: Sword Fight

Our Elf on the Shelf is ready to battle the nutcrackers for Hershey Kisses!  The truth is, he'll leave them when he heads to the North Pole tonight, and the kids win the chocolate.
This can easily be done with any stuffed animals (you may need a rubber band or glue dot to make the sword picks stay), army men, etc. The sword picks can be found at many grocery and any party supply stores.
Check out all of my other Elf on the Shelf ideas and printables, too!
As always, I encourage you to create some of the "super special" Elf surprises, and then trade them with your friends and neighbors so that the joy (and efforts) are shared!!!
By all means, share this, pin it, print it, blog about it, but please link back to this post. 

Tuesday, December 15, 2015

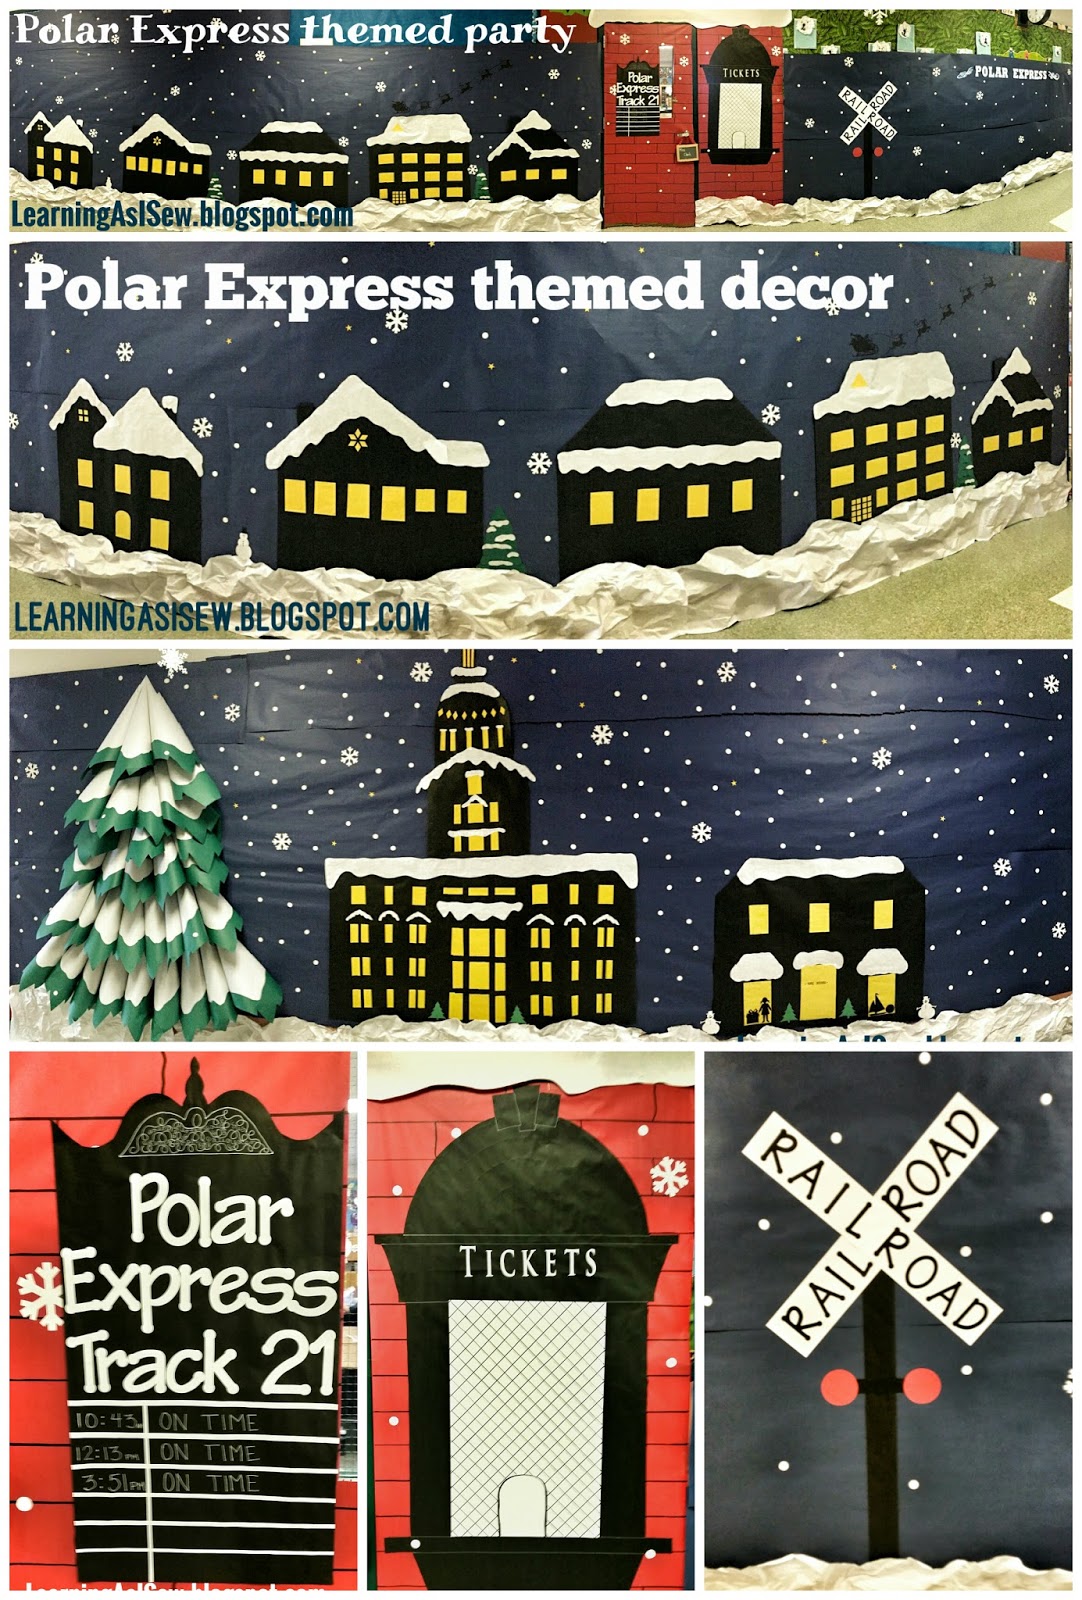
Polar Express themed decor

Our 1st grade team does an annual Polar Express themed party, and they make an awesome train that goes down one side of the hallway. I really wanted to dress up the other side with what might be seen out of the train windows.  A town square with a huge 3D Christmas tree, a town hall, toy store, residential neighborhood, Santa and his reindeer flying through the night, a train station with a train schedule, ticket booth, and railroad crossing. 
Pro-tip: If you can get access to a die cut machine with a 1" circle press, it is the fastest way to make all of that snow.  I love my Cricut and Silhouette, but I use several layers of paper at a time with the die cutter.