home categories contact about me store
This blog is part of at least one affiliate program. As an Amazon Associate I earn from qualifying purchases.
Showing posts with label freezable. Show all posts

Thursday, November 5, 2020

RV Renovation: Interior Lighting, Wallpaper, Vinyl, FREE SVGs, and More

I hope you're enjoying the journey of our travel trailer makeover.  It moves much more quickly for you in the blog world than it did for me in the actual real-life makeover, but I'm getting to relive the drastic transformation without having to go through all of the work again.

There were 2 spots in the camper that I've not been able to find new lights for due to the space required for the slides to come in.  One is in the bunkhouse, and the other is in the main living area.  For now, we'll keep the standard lights there, and I'm not entirely concerned if they don't ever get replaced.

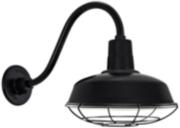
I found these super cute Farmhouse Cage Lights, and I ordered them immediately!  I was so excited to get them installed.  They came with Edison bulbs that were perfect (or so I thought,) and I all but dragged my husband out to the storage facility to install them.  They wouldn't turn on.  He tried several different things, and we were trouble-shooting all kinds of things.  We spent about 2 weeks trying to get them to turn on.  Then, I found it!  I hadn't seen it on any of the blogs I had been reading, but sure enough...some campers ONLY support 12v bulbs.  Sure, we plug in with 50 amps to run our air conditioners, but our camper only supports 12v bulbs.  I was so excited to have these beauties come on as soon as we got 12v Edison bulbs!  The moral of the story is to make sure your light bulb matches the voltage of the existing fixtures whether it's 120v or 12v, be sure you know how your camper is wired.


Reclaimed Shiplap Peel & Stick Wallpaper

Yes, I painted our bathroom door that dark Iron Ore gray, because it gets so much traffic.  What you may NOT notice is that the cheap doorknob with no lock is GONE. Sayonara, sucker!  A new black doorknob with a lock has replaced it.  This is one upgrade that EVERYONE was excited about.  Why we didn't do it sooner, I have no idea.

I initially only bought a couple of rolls of this Peel & Stick Wallpaper.  (You want to make sure they were made in the same batch/lot so that the colors match, so it's good to order them all at once.)  I ended up using it in more places than I originally thought I would, and I had to order a 3rd roll.  Fortunately it matches my 2 original rolls.  I used it on the 2 walls you see here, one next to the main slide out, a wall as you enter the bunkhouse, on the master sliding door, and as an accent in our Master bedroom.

You can see the smudges on the chalk map above.  I initially used regular chalk, but of course, someone needed to touch it to see if it was real chalk.  So, I brought my chalk markers out and have labeled the states our RV has visited.
Chalk Map Peel & Stick Giant Decal
I cut the "Adventure Awaits" on my Silhouette,
and you can have that SVG file for FREE below.

I'm not a giant by any stretch, but I frequently bump my head on the slide out ceiling or lights even when they were the super low-profile standard camper lights that came with it.  I was determined to find a way to create something that is low profile that has a switch.  I wandered around our home improvement stores, and this is what I came up with!  

A piece of thin wood, some stain, black cast iron floor flange, a cast iron elbow, a coupler, a lamp receptacle, and wire.  (These were MUCH more affordable to make than some of my other lighting choices.)

I was able to find a coupler that fit perfectly over the base of the lamp receptacle, so once we had the new lamp receptacle wired, we super glued it inside of the coupler before assembling the light fixture.  The lamp receptacles I found were all for 3 way lights.  My light isn't 3 way, so I just click it twice to turn on and twice to turn off.  We made 2 of these for the living area in the slide out, and I have something very similar planned for over my kitchen sink.  Instead of having 1 light using an elbow, I have a T-pipe so that it will have 2 lights to brighten my sink and countertops like daylight. 
Barn Light and DIY Industrial Light

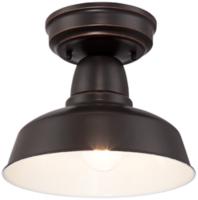
I ordered the barn light and was thrilled when it arrived.  I took it out of the box, and then it hit me....  There's not a SWITCH for that light like there is for the ceiling lights.  Fortunately, I had not yet thrown away the little MIS-MATCHED (yes, it really did annoy me that they were different colors) sconce light that came in the camper.  We pulled the wiring and button from it, and added it to my new barn light.  We added another 12v Edison, and it's perfect!
In our camper's bunkhouse alone, there are at least 6 light bulbs.  In the main living area, there were 14 light bulbs.  They put off a LOT of heat, and I've seen some RVs that actually have burn marks from those bulbs.  I knew I wanted to replace many of the fixtures (and I'm not done quite yet,) but this also gave us some incentive to replace all of the bulbs in the lights we were keeping with LED 12 volt bulbs.  The kids will actually turn their lights on now, because they don't feel like they have a heater next to their heads!

Standard Light Fixture in an RV
Standard Light on the left, LED on the right


When the lights are off, you really have to look to see if there's an incandescent or LED bulb.  Our incandescent lights were very "warm" literally and visually.  The LEDs are a more neutral white, and they don't emit the heat!

The same Reclaimed Shiplap Peel & Stick Wallpaper from the living area, but turned sideways in the Master Bedroom.

I cut this with my Silhouette as well, but I've tried to remove our wedding anniversary below the arrows from the image for the blog.  FREE Downloadable SVG is below.


Check out the rest of my RV posts here.

Wednesday, April 25, 2012

Sicilian Casserole


Sicilian Casserole

My cousin, Nicole, asked me for a pasta and sausage casserole recipe this morning and said she couldn't find it on the blog.  I searched, and to my surprise, I never posted this!  I'm still searching for the picture since he made it the first time in the summer of 2010.  We froze one of the casseroles, and we had it for dinner on his first day of Kindergarten.  (Too bad I didn't realize it wasn't posted when Breckin made this LAST week.)

This was the first meal for our oldest son, Breckin, to cook by himself at age 6. It's not the healthiest meal that we eat, but everyone loves it.  It's a nice treat.  Our twins devour this dish and have since the first time they had it at age 1.  Enjoy!

Prep Time: 15 mins                             Total Time: 45 mins

1 lb Italian sausage, casings removed (I use half mild or sweet and half spicy)     
1 onion, chopped
1 green bell pepper, chopped                                                             
1 (6 ounce) can tomato paste
1 (8 ounce) can tomato sauce                                                         
3/4 cup chicken stock (or water)
1/2 teaspoon dried Italian seasoning                                              
2 cups elbow macaroni (we actually use Gemelli instead of macaroni)
8 ounces cream cheese, cubed                                                          
3/4 cup milk
1/3 cup sour cream                                                                             
3/4 cup grated parmesan cheese, divided

  1. Preheat oven to 350 degrees. Brown sausage, onion and pepper in saucepan. Cook until sausage is done. Drain well.
  2. Add tomato paste, tomato sauce, water, and dried Italian seasoning and stir well to blend.
  3. Let simmer for 10 minutes.
  4. Meanwhile, cook pasta as directed on package. While pasta is cooking, combine cream cheese and milk in medium bowl. Cook in microwave on medium power for 2-3 minutes, stirring once halfway through cooking. Remove from microwave and stir with wire whisk until sauce is smooth.
  5. Drain noodles and add to cream cheese sauce along with sour cream and 1/2 cup Parmesan cheese; stir.
  6. In 2 quart casserole dish, place all of cream cheese mixture. Top with all of the sausage mixture and sprinkle with remaining 1/4 cup Parmesan cheese.
  7. Bake at 350 degrees for 20-30 minutes until casserole is bubbly.

**To freeze, add 1 tablespoon cornstarch to the cream cheese sauce. Prepare casserole as directed, except instead of baking, chill in refrigerator. Wrap well and freeze up to 3 months.
To thaw and reheat, thaw casserole overnight in refrigerator.
Bake, covered, for 25-35 minutes 5 minutes longer until bubbly.

Thursday, November 18, 2010

Lentils?

If you shop at Costco, you may have tried a sample, seen, or purchased Tasty Bite's Madras Lentils.  They're fantastic.  My 5 year old LOVED them in the store.  Four packets come in a box.  Each packet is 2 servings and takes only 90 seconds to heat in the microwave.  However, I know how much lentils REALLY cost, and I had a hard time paying the premium for the convenience of these truly yummy nutrient-packed lentils and red beans. 
Yesterday, I took it upon myself to create something similar that I could easily freeze in Ziplocs and pull out when I needed the "convenience." We were very pleased with the outcome.  The crockpot makes this even easier, although a few steps do require the stove.

Dawn's Madras Lentils
Ingredients:
1 can diced tomatoes
1 can tomato puree
1 can chicken broth
1 bag dried red kidney beans
1 T garlic olive oil
4 T butter or Smart Balance
1 finely minced onion
2 C lentils
2 T cumin
1 tsp. thai red curry paste
cayenne, to taste
chipotle chili powder, to taste
1/2 - 1 C cream (or Cacique Crema Mexicana)
Directions:
Soak beans according to package directions.
Place garlic olive oil, butter, and onions in a small skillet over medium heat.  Once the onions begin to soften, add the lentils and stir for another 2-3 minutes.  Salt as desired.
In a large crock pot, mix diced tomatoes, puree, chicken broth, pre-soaked beans and lentil/onion mixture.  Add 1 1/2 T cumin and Thai red curry paste.  Cook on high for 6 hours or on low for up to 12 hours.  Add chicken stock as needed.  I prefer mine to be thick like a chili, but some prefer it to be more like a stew.
Add remaining cumin, cayenne, and chipotle chili powder to taste.
Stir in cream, and serve!

post signature

Friday, August 13, 2010

Now and Later Lasagna

I've always loved my mom's lasagna, but no matter how hard I try, when I make it, it just isn't the same.  Last night, I think I finally came up with a lasagna recipe that I love, and I can easily make enough to freeze AND I made it without any eggs.  Being that our middle child is highly allergic to eggs, that's a big deal.  Here is the recipe, enjoy!
Italian Sausage Basil Lasagna

*eggless option
Sauce:
2 tablespoons olive oil (I use a homemade garlic infused olive oil that I keep by my stove)
1 ½ pounds spicy Italian sausages, casings removed (or sweet or mild Italian sausage - I used 2 sweet and 1 hot, and all 3 kids still loved it)
1 cup chopped onion
3 large garlic cloves, chopped
2 teaspoons fresh oregano (dried is fine, too)
1/4 teaspoon dried crushed red pepper (may omit if feeding to children)
1 28-ounce jar tomato & basil spaghetti sauce
1 14 1/2-ounce can diced tomatoes with green pepper and onion (do not drain)
½ C red wine
5 oz. button mushrooms, sliced

Filling:
1 1/2 cups (packed) fresh basil leaves
1 15-ounce container ricotta cheese
2 C grated mozzarella cheese (about 8 ounces)
3/4 cup grated Parmesan cheese (about 2 ounces)
1 large egg (or *1 plain gelatin packet with 2 T warm water prepared just before adding to recipe)
1/2 teaspoon salt
1/4 teaspoon ground black pepper

Assembly:
12 no-boil lasagna noodles from one 8-ounce package
3 cups (packed) grated mozzarella cheese (about 12 ounces)
1 cup grated Parmesan cheese (about 3 ounces)
Nonstick olive oil spray

Directions for Sauce:
Heat oil in heavy large pot over medium-high heat. Add sausages, onion, garlic, oregano (if dried) and crushed red pepper and sauté until sausage is cooked through, mashing sausage into small pieces with back of fork, about 10 minutes. Add spaghetti sauce and diced tomatoes with juices. Bring sauce to boil. Reduce heat to medium, add wine and mushrooms. Simmer 5 minutes to blend flavors. Season with fresh oregano, salt, and pepper. (Can be made 1 day ahead. Chill until cold, then cover and keep chilled.)

Filling:
Finely chop basil. Add ricotta, mozzarella, Parmesan, egg or *gelatin mixture, 1/2 teaspoon salt and 1/4 teaspoon pepper. Stir until blended.

Assembly:
Preheat oven to 350°F. Spread 1 1/4 cups sauce in 13x9x2-inch glass baking dish or 2 9x9 squares (one for now, and one to freeze.) Arrange 2-3 noodles on sauce. Drop 1 1/2 cups filling over noodles, then spread evenly to cover. Cover with sauce. Sprinkle with 3/4 cup mozzarella cheese and 1/4 cup Parmesan cheese. Repeat layering of noodles, filling, sauce and cheeses 2 more times. Top with remaining 3 noodles. Spoon remaining filling, then sauce atop noodles. Sprinkle with remaining cheeses. Spray large piece of foil with nonstick olive oil spray. Cover lasagna with foil, sprayed side down.

Bake lasagna 40 minutes. Carefully uncover. Bake until noodles are tender, sauce bubbles thickly and edges of lasagna are golden and puffed, about 10 minutes. Transfer to work surface; let stand 15 minutes before serving.


post signature