home categories contact about me store
This blog is part of at least one affiliate program. As an Amazon Associate I earn from qualifying purchases.

Monday, December 22, 2014

Elf on the Shelf: Despicable Me Minions

Our family and friends had a Despicable Me 2 themed Halloween last year. We had desserts, treats, and costumes.   This Elf on the Shelf BANANA idea should hit the mark with our littles.

Saturday, December 20, 2014

Elf on the Shelf: Tent Camping

Buddy Kringle enjoys the outdoors and went camping last night.  The tent is SUPER EASY!  The fire didn't take long, and could be made ahead and used for marshmallow roasting, too. (I may execute a mid-day move and have him roasting marshmallows tonight, because we intend to do so with the kids tonight.)

I used 1 piece of cardstock folded in half to make the tent.
I used some brown construction paper rolled and taped for logs. I cut a 2 inch strip of yellow tissue paper (from the short side) and cut peaks and valley zig zag down the middle of its length. Take the flat edge and gather it, twisting into a "flower."  Then, you have 2 flames to tuck between the logs.

Alternatively, you could make the logs out of unwrapped Tootsie rolls, and the flames could easily be shaped from red, yellow, and orange Starburst.  (I just don't trust my kids or 4 legged babies not to get into it, and I don't want sick pets or kids at Christmas.)
 
Aaaand...he moved before dinner!  He was signaling a campfire with roasted marshmallows tonight!


By all means share this, pin it, print it, blog about it, but link back to this page and not directly to the printable links.
 
Check out our other Elf on the Shelf ideas and printables here!
 

Thursday, December 18, 2014

Grinch Themed Party: Part 1

The Kindergarten classes are having Grinch-themed Christmas parties this year, and I have been working on decor and a photobooth.  Our twins are in different classes, so everything is x2. 
 
Today, I started putting some of it up!  The party is officially tomorrow, so more to come.  It's beginning to look like Who-ville!
I made a ton of fun signs using Seuss words, too.  I printed a quote from the movie with a free printable HERE.  I know the kids are going to love it.


Elf on the Shelf: Do You Want to Build a Donut Snowman?


Donuts are a rare treat in our home, but the kids have done really well the last few days, and I broke out the package of 6 that I've had stashed away for 2 weeks now.

I used one orange Starburst (cut, and then molded with my fingers) for the noses.  Chocolate chips were used for the rest.  I *thought* I had mini chocolate chips, but alas, they were gone, so I had to make due with the regular ones.  I think the snowmen would have been even more adorable with the small ones.  I used a couple of pretzels for the arms.

Once I had them all laid out on the plate, I felt like it needed something else.   I had printed out some free printables from Frugal Coupon Living which you can find HERE, and I cut out the "What did one snowman say to the other?" card.  I added the card and a few baby carrots around the plate and charger. 

By all means share this, pin it, print it, blog about it, but please link back to this page.
 
Check out our other Elf on the Shelf ideas and printables here!

Monday, December 15, 2014

Elf on the Shelf: Super Hero Cape Template FREE Printable

Whether your Elf wants one cape or 20 (to play Super Hero dress up, of course), this FREE Printable is for you.

Check out all of my other Elf on the Shelf ideas and printables, too!
As always, I encourage you to create some of the "super special" Elf surprises, and then trade them with your friends and neighbors so that the joy (and efforts) are shared!!!
By all means, share this, pin it, print it, blog about it, but please link back to this post. 
You can purchase all of my Elf on the Shelf printables in the store to the right for easy and immediate download.

Wednesday, December 10, 2014

Elf on the Shelf: Apple Jack & Mid-day Move

Buddy Kringle left a message with Apple Jacks this morning.  We don't usually buy Apple Jacks,  so it was a bit of a treat.  I didn't want to leave them open all night and all day only to be stale by tomorrow.   So, he moved during the day to the top of the box with an Apple Jack on his hand.  The kids were super surprised and noticed immediately.   I won't be moving him every day a 2nd time, but today worked!
Check out our other Elf on the Shelf ideas and free printables here!

Tuesday, December 9, 2014

Elf on the Shelf: ON the Shelf & Window Cling

A loose artificial tree branch turned Christmas "tree", cardstock wrapped books, and a $1 Elf on the Shelf window cling are in Buddy Kringle's arsenal today.  (You could also make a copy of the front of your Elf on the Shelf book, cut out the Elf on the Shelf, and tape it to your window or place near the shelf.)
Check out our other Elf on the Shelf ideas and free printables here!

Sunday, December 7, 2014

Christmas Decor

Christmas is my favorite time of year!   With Thanksgiving falling so late this year, I may not put all of our decor up this year.  I love having the silver bells polished and hung and all of our Christmas trees up, but I also want to spend this little bit of time enjoying activities and experiences with my family. So, I am giving myself permission this year to not put it all out.  May your Christmas season be filled with love and blessings.

Elf on the Shelf: Miniature Colored Pencils

Buddy Kringle wrote a Christmas message for the kids with elf-sized colored pencils (found at Five Below for $1.)  I have also found a tiny "legal pad" at Party City for a few cents.
Check out our other Elf on the Shelf ideas and free printables here!

Saturday, December 6, 2014

Elf on the Shelf: Drive in Movie

Whether you have a Barbie car, an overload of HotWheels, antique cars or paper cars from Steak 'n' Shake, you probably have all you need to have a Drive In Movie for your elf.   Dinosaurs could easily join as well. I printed an image from "Elf" the movie and a "Drive in theater" sign off of Google images.
I had visions of grandeur to create the on-car speakers, but I decided the kids wouldn't get it and it was just more work for me.
Check out our other Elf on the Shelf ideas and free printables here!

Thursday, December 4, 2014

Elf on the Shelf: Bath time fun

Our elf, Buddy Kringle, used Wilton Food Writers to create bubbles on marshmallows.  A washcloth was cut and tacked with a couple of stitches for a bath towel, one for his hair, and a bath pillow.
Happy Elfing!
Check out our other Elf on the Shelf ideas and printables here!

Monday, December 1, 2014

Elf on the Shelf: Rappelling & Zip Line

Buddy Kringle is rappelling this evening.  He knows nothing about knots or how to use carabiners.  He has rope all over the living room!  The carabiners are super cheap on Oriental Trading Company.  We had rope in the garage.  You could easily do this without the rope, but the carabiners made it easy to attach to vents, Christmas decor, and curtain rods.  It takes about 5 minutes, but you probably have everything on hand.

Check out our other Elf on the Shelf ideas and printables here!

Our Elf seems to have caused more mischief and moved while the kids were at school.


Saturday, November 29, 2014

Elf on the Shelf Welcome Breakfast: Gingerbread

Our Elf returned and brought a slew of activities to entertain the kids through the weekend.
Gingerbread pancakes were kept simple, but the kids can add eyes, smiles, and buttons with fruit or chocolate chips. I will have to share my new recipe, because they were truly delish! Chocolate  milk turned the milk bottles into little gingerbread people.  Custom gingerbread cookie people resembled each child and were saved for after lunch.
Kraft wrapping paper made perfect placemats with a checklist of activities.  An envelope of gingerbread coloring (and educational) pages was at each place setting.
Thankful ornaments have become a family tradition at the welcome breakfast.  Paper gingerbread ornaments and ceramic gingerbread ornaments were additional craft activities.  Read more
here.
A cardboard playhouse was assembled inside out so that it could be colored to resemble a life size gingerbread house.
The gingerbread house bar included a few types of cereal that work well as "bricks" and "shingles."  Sugar cones were stacked to create Christmas trees of different heights for outside of the gingerbread houses. Of course, standard candy pieces were also included.
The reindeer food bar was a quick easy activity that I always seem to forget to do until Christmas Eve.  This year, we were on top of it!
I have had some readers contact me with issues with Dropbox.  so in an effort to make things easier, we have created a Store where you can pay $5 for ALL of our Elf on the Shelf printable downloads to date, and they will be available to you instantly!  Merry Christmas!  Hopefully that saves you some time in trying to find and download each of the printables. 
Check out our other Elf on the Shelf ideas and printables here!
 

Tuesday, November 18, 2014

Gingerbread or Snowman Milk Bottles

In preparation for our Gingerbread-themed Welcome Breakfast for our Elf on the Shelf, I've been crafting a bit.  I painted these Starbucks Frappuccino bottles with Enamel paint and baked them for 30 minutes at 350 as directed to set the paint.  I added another row of white "rick-rack" at the bottom of each of the bottles, too.  When they are filled with chocolate milk, they look even more like Gingerbread people!
They were super easy to make, and I think they'll be an adorable accent to the table next Friday morning.
 

Tuesday, October 21, 2014

Recipe: The BEST Oatmeal Cookies

I really don't love sweets the way I did once upon a time.  I could take them or leave them entirely...except when these are around.  They are chewy deliciousness that I simply cannot resist.
 
Dawn’s Oatmeal Cookies
Ingredients:
1 cup (2 sticks) butter
1 cup granulated sugar
1 cup packed light brown sugar
2 eggs
1 t. vanilla extract
1 t. baking powder
1 t. baking soda
2 1/4 cups all-purpose flour
2 -1/2 cups shredded coconut
1 cup chopped pecans (can be substituted or omitted as preferred)
½ large apple, diced
2 cups oatmeal (not instant packets - just plain oatmeal)

Directions:
Heat oven to 350 degrees. Grease 2 large cookie sheets. Cream butter and sugars in mixer until light and fluffy.
Add eggs, beat together.
Add vanilla, baking powder and baking soda.
Add the flour.
Mix until well combined.
Mix in coconut, apple, and nuts.
Mix in oatmeal.
Drop on greased cookie sheets by the tsp., spacing about 2 inches apart.
Bake 12 to 15 minutes, just until the edges begin to brown. Transfer to a wire rack to cool.

Monday, October 20, 2014

Camping Themed Halloween Costumes: Campfire, RV Travel Trailer, Roasted Marshmallow, S'mores, Firefly

Every year, our family goes camping at some point around Halloween.  I remember doing it with my family when I was a little girl.  Now, it's a much bigger affair - my dad & step-mom, my sisters and their families, my family, and 3-6 other families of friends of ours. 
That being said, we have had a lot of fun in recent years choosing costume "themes" for everyone to participate in if they wish.  We've done Peter Pan, Gnomeo & Juliet, Night at the Movies, Despicable Me 2, and this year...is CAMPING!
I'm not going to lie, this year's costumes have been much more time intensive than past years, but they're SO cool (if I do say so myself.)  All 3 of our kids' costumes have a battery-operated light system incorporated, and now that I've done it, I may never make costumes without them.  It's truly an ingenious way to keep track of my kiddos as they trick or treat.
We have professional Halloween pictures taken annually as part of a charity fundraiser, so I had to have the kids costumes complete by October 4th.  So...they were mostly complete.  I've been making some modifications since then, and I've added a jar of "fireflies" to my daughter's costume, too.  It took me about 2-3 weeks to make their costumes.  (We don't have all of the professional images as of yet.)
I'll be sharing my "How to make a Campfire costume" as a bit of a series.  It was certainly some trial and error.
My campfire is trying to "hide" like his brother the travel trailer had only moments earlier.
He's not REALLY being eaten by his costume.
Campfire Costume made by LearningAsISew.BlogSpot.com

CAMPFIRE Costume:

I've seen a lot of them out there on Pinterest and other places, but I took a few ideas and then created my own.  (A couple that were instrumental in forming my ideas were campfire costume from SavvyHomemade and this cauldron.  There are a few things I'd do differently if I had it to do again (which I have absolutely no intention of) that would make it less cumbersome, a faster project, and an even better final product.  So, don't do as I did - do as I say. 
1. Determine how big you want the campfire.  This may seem like it should be "built" around the size of the person, but remember that you want to be able to greet others, pick candy while trick or treating, and get through doorways (and fit it in your car if necessary.)  This being said, know that the "rocks" will protrude from your base all the way around, so account for them as well when determining the size of your base. 
2. I used a piece of foam board for the base, and it worked beautifully.  I will say that I should have made it smaller for my little guy.  It certainly has "wow-factor" as it is.  *wink wink*  I covered the board in aluminum foil to help reflect the light from the lights.  I'm not sure how much it actually helps, but it only took a couple of minutes.

3. I used orange wiffle balls  (red, orange, yellow, or white would work just as well) cut in half and placed them around the outer ring of the fire (not under the "rocks" but outside the actual "fire."  I wove battery operated red, orange, and yellow lights through the wiffle balls, and then tucked the remainder in through the hole in the foam board to be used later with the flames.  I affixed the battery operated pack to the foam board with the "on/off" switch facing the opening in the foam board and with the battery access on top.  I left an opening in the chicken wire for easiest access to the light's box.  (If I had this to do again, I would use an entire strand of lights for this part and a separate set for in the flames.)
4. I used chicken wire to create a general shape for the fire and give myself something to attach everything to.  The excess was tucked under all the way around (and inside) the foam board, and I twisted all sharp edges to prevent any sharp protrusions.

5.  I then sprayed Great Stuff foam insulation over the chicken wire outer edges and wiffle balls.  This was to create ash and embers.  I spray painted it white (leaving small spots of yellow) and misted it lightly with black spray paint to create a more realistic look. 
6. I used one (orange) pool noodle cut into 6 lengths for "logs."  You could use orange, pink, brown, red, or yellow, but I wouldn't try it with a green, blue, or purple noodle.  I spray painted them all solid with one color of brown.  I used a second color of brown to spray on some depth.  I finished with quick burst "stripes" of black to finish.  I cut tan foam circles and drew on them with a black sharpie to create the rings on the cut edge of the logs. I attached the logs with zip ties that I poked through the logs and then threaded through the chicken wire.

7. I took a piece of red felt and covered the bottom of the costume and tucked the edges around and into the "fire" side.  I used a good bit of hot glue to make this all stay. 
8. Rocks were created with a couple of different grey fabrics stuffed with crumpled newspaper.  If I had it to do again, I'd probably randomly spray paint the fabric before cutting it with different colors (white, brown, dark brown, and black.)  I sewed these closed, and then I attached them to the chicken wire.  Again, if I had it to do again, I would probably sew each rock to the ones next to it before I started attaching them to the campfire.  Be sure that you attach these securely to the chicken wire/board.  I added some black splotches to the rocks once the entire costume was complete, because they looked really blah compared to the rest of its awesomeness. 


9.  I followed what some of the other campfires had suggested for the actual fire (plastic tablecloths, colored cellophane, wires, spray adhesive.)  I do not recommend that; it was really time consuming, and ultimately it didn't "fill" the fire the way I had hoped.  If I were to do it again, I'd maybe make about 6 of those and make them fairly big to help give the overall fire some stable height.  Otherwise, there are other things you can do that fill it just as well, but with much less time investment.  I actually tried a few other things of my own, too, that I wouldn't recommend.  (I tried a glittered red tulle threaded through to fill in the chicken wire, and although the loose red glitter on the "ashes" was really cool, it took entirely too much tulle to fill the spaces.)  INSTEAD, I would make those 6 or so flames (taking into account the height of the person and where the costume will "ride" on their body) and then I would fill in the inner ring with a second set of lights leaving about 8 lights at the non-battery end to attach to the stabilized flames.  Then, I would use red and orange cellophane (often used to wrap gift baskets) to weave through the exposed chicken wire and under the logs.
10.  I used nylon straps, heavy duty Velcro, and felt (for the flames) to create straps to hold the costume on my little guy.  Due to the weight, I decided to have them criss-cross in the back.  Because of the Velcro, these are adjustable and can be moved around the chicken wire for best balance.
11.  Attach the wired cellophane flames between the logs closest to the costume wearer's body and affix the remaining lights to the flames.
12.  Use strips of cellophane or tissue paper (torn and roughly rolled) to create additional flames and fill in the "empty" spaces.  Use cellophane to cover any additional exposed chicken wire.

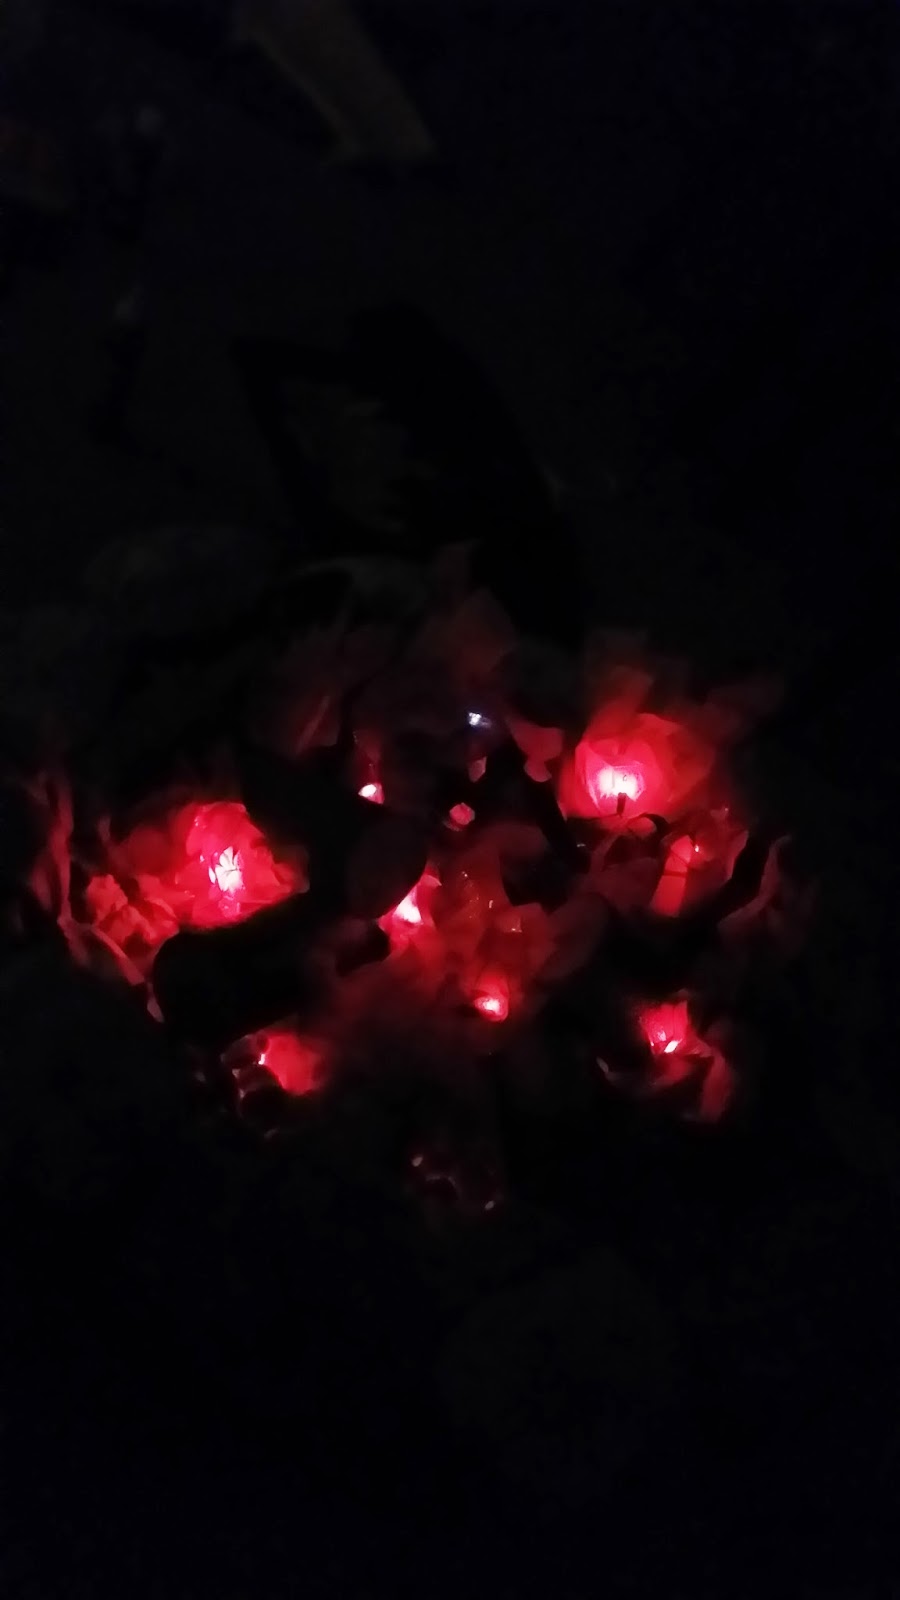
Campfire costume in the dark (with only 1 set of battery operated lights.)

13.  The shirt can be easily made with felt and can be no-sew if you wish.  Others have continued the flames all the way up to their head.  Others have made marshmallows on a stick as a hat for this costume.  That didn't work for our family, because my husband is actually wearing the marshmallow/stick on his head since we will be walking around with our little ones anyway. 

Happy camping!

Sunday, October 12, 2014

Easy Pumpkin Cream Cheese Mummies!

Whether you want to make it all from scratch or use store-bought items, these Pumpkin Cream Cheese Mummy kolaches are sure to be a Halloween favorite.
 
Easy Pumpkin Cream Cheese Mummies
 
Ingredients:
  • Crescent roll sheets (I used regular crescent rolls and pressed them together, because our store didn't have any crescent sheets.)
  • Pumpkin butter (homemade is my preference, but store-bought works just as well. I use a modified version of this recipe. This could also be substituted with any jelly or other fruit butter.)
  • 3 oz. Cream cheese, softened
  • 1/4 cup butter, softened
  • 1/2 cup confectioner’s sugar
  •  1 teaspoon vanilla extract (I used clear Mexican Vanilla)
  •  1 Tablespoon milk (more as desired) 
  • Candy eyes (or raisins, dried cherries or blueberries, or other candies)
Directions:
 
  1. Whip cream cheese, butter, sugar, vanilla, and milk until smooth.
  2. Roll out crescent roll sheets on parchment paper and divide into 4 rectangles.
  3. Cut slits on left 1/3 and right 1/3 of each rectangle.
  4. Spread cream cheese mixture in center 1/3 of each rectangle.
  5. Spread pumpkin butter on top of cream cheese mixture.
  6. Pull alternating strips across the center of each rectangle leaving a slight opening near the top for the eyes. 
  7. If you are using dried fruit, you can place them in before baking.  If you are using candy for the eyes, place them in after baking.
  8. Bake at 375 for 12-15 minutes.
To help save some money any time of the year, check out Raise.com! You can buy a gift card to get great deals when shopping for ingredients or sell gift cards for cash. This great new site lets users purchase gift cards for less than their value, helping to save you some extra money-- be sure to check out this site when planning to make your Halloween treats!

Thursday, October 9, 2014

Elf on the Shelf: Christmas Tree Costume with FREE Printable Template

This easy fun Elf costume could be used in many different ways throughout the season.  It can be sewn in a matter of a couple of minutes, or for a no-sew version you can use fabric glue or Heat-n-bond to make one. 

Have your elf hide amongst your Christmas décor, hold an ornament and "make like a tree", hide in a heap of small elf-sized-wrapped boxes, or hang out on a platter of Christmas tree-shaped cookies.  You can stuff the tree to make it puffy if you wish, too.
Click HERE for the FREE Printable Christmas Tree Costume Tem

By all means share this, pin it, print it, blog about it, but link back to this page and not directly to the printable links.
 
Check out our other Elf on the Shelf ideas and printables here!
plate.

Tuesday, October 7, 2014

Elf on the Shelf: Do you want to build a SNOWMAN?

If your kids love the movie Frozen (or even if they just like snow), this is a fun easy Elf on the Shelf idea (and FREE Printable snowman parts.)
All you need is a roll of toilet paper and some scissors and tape or scrapbooking glue.  You can either cut out each individual piece or cut a rectangle around each snowman and attach them to a roll of toilet paper (with the toilet paper still on it.)  If you have some extra cotton balls (or even marshmallows), you can add those to your snowman scene, too!

Check out all of my other Elf on the Shelf ideas and printables, too!
As always, I encourage you to create some of the "super special" Elf surprises, and then trade them with your friends and neighbors so that the joy (and efforts) are shared!!!
By all means, share this, pin it, print it, blog about it, but please link back to this post. 
You can purchase all of my Elf on the Shelf printables in the store to the right for easy and immediate download.